

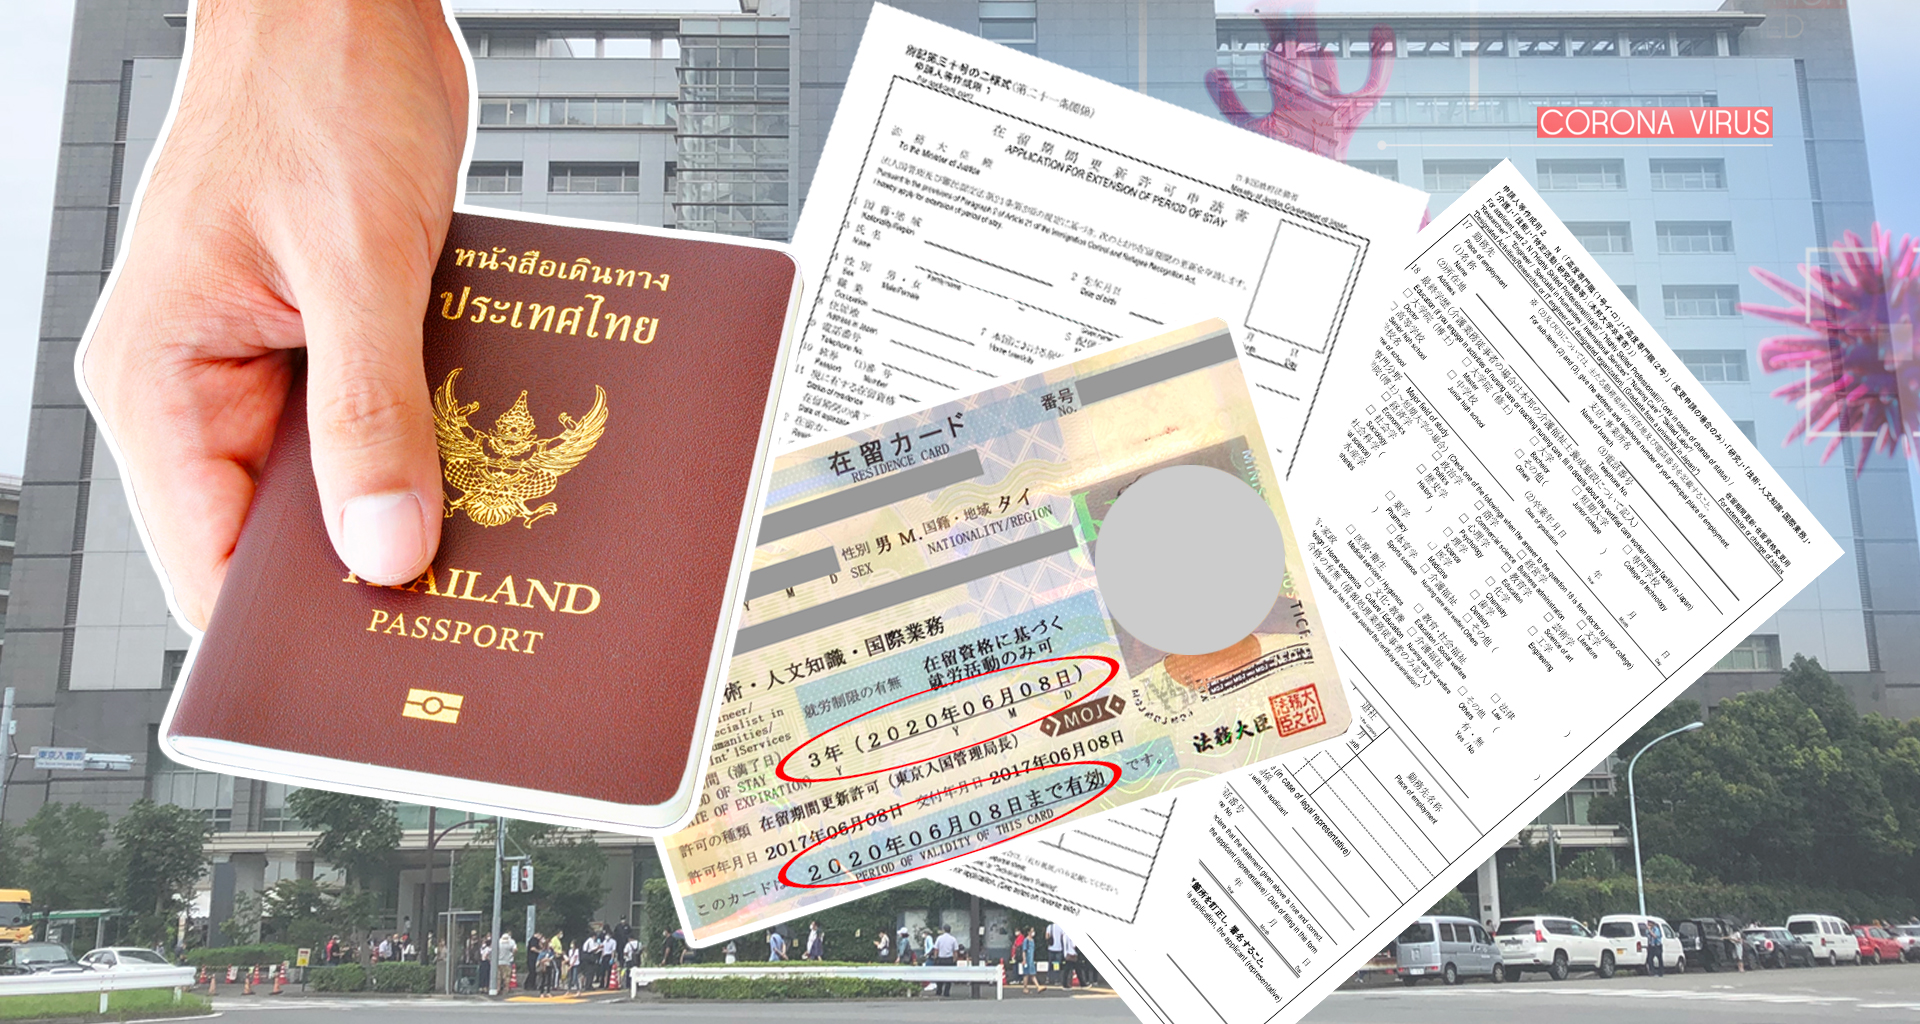

Having to extend visas is not anything new for foreigners in Japan. Although many may not be comfortable with the idea of going outside considering the current COVID-19 situation, they may not have a choice due to the fact that the visa extension process is still not able to be done online. One of our editors wrote this article to alleviate the concerns of those who are worried about having to deal with this bureaucratic process; let’s see how the process is done during the pandemic!
No one wants to be in any crowded areas with COVID-19 still affecting the world population, and we should all be looking to avoid the three Cs (crowded places, closed spaces, and close contact). But this may be unavoidable for those whose visas have or are close to expiring, as it is a crime to fail to apply for a visa extension before your visa has expired. Fortunately, the immigration office is not so indifferent to the current global situation; in order to reduce the numbers of visitors to the Immigration Bureau per day, they are providing a 3-month extension for visa renewal for those whose visas expired during March to July 2020 (you can find more details in the document below).

So, when does your visa expire?
The answer is easy to find. Just grab your Resident Card (or Zairyu Card) and check the expiration date written on the card. You are going to want to begin preparing all the documents you need about one to two months in advance (do not save things until the last minute!).
The example zairyu card shown below expired on June 8th, 2020, but with the current COVID-19 situation policy, the owner will have another 3 months, or until September 8th, to extend their visa. The period after applying for a new visa and before receiving it will be considered overstay.

Now let’s get to the main topic of the article. (Before leaving your cozy home, don’t forget to pack your mask, wet tissues, hand sanitizer, and necessary visa documents!)
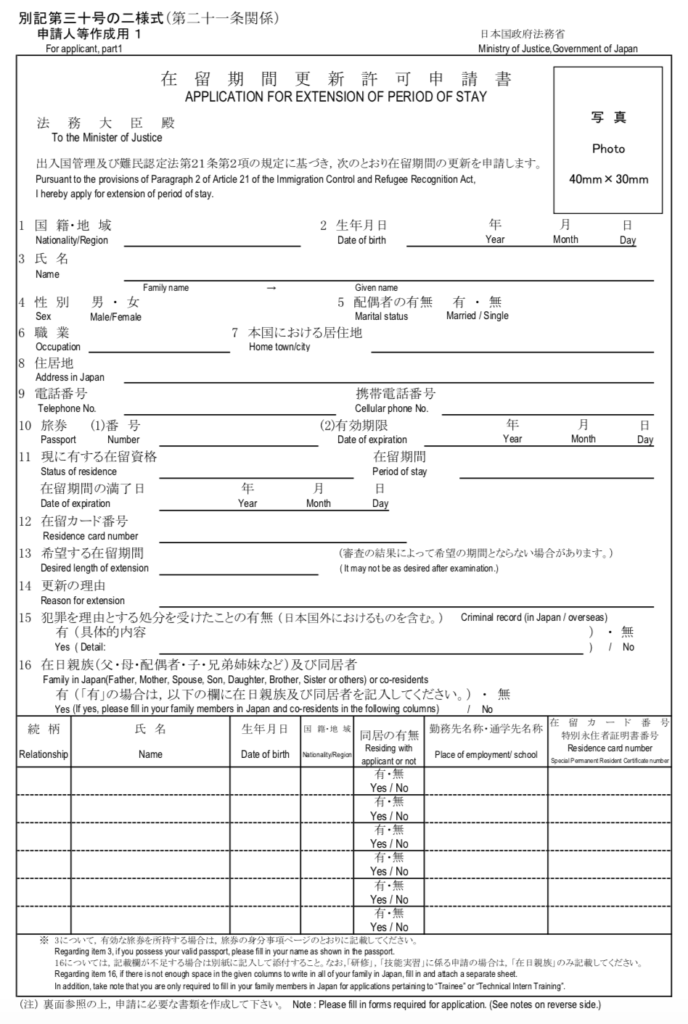
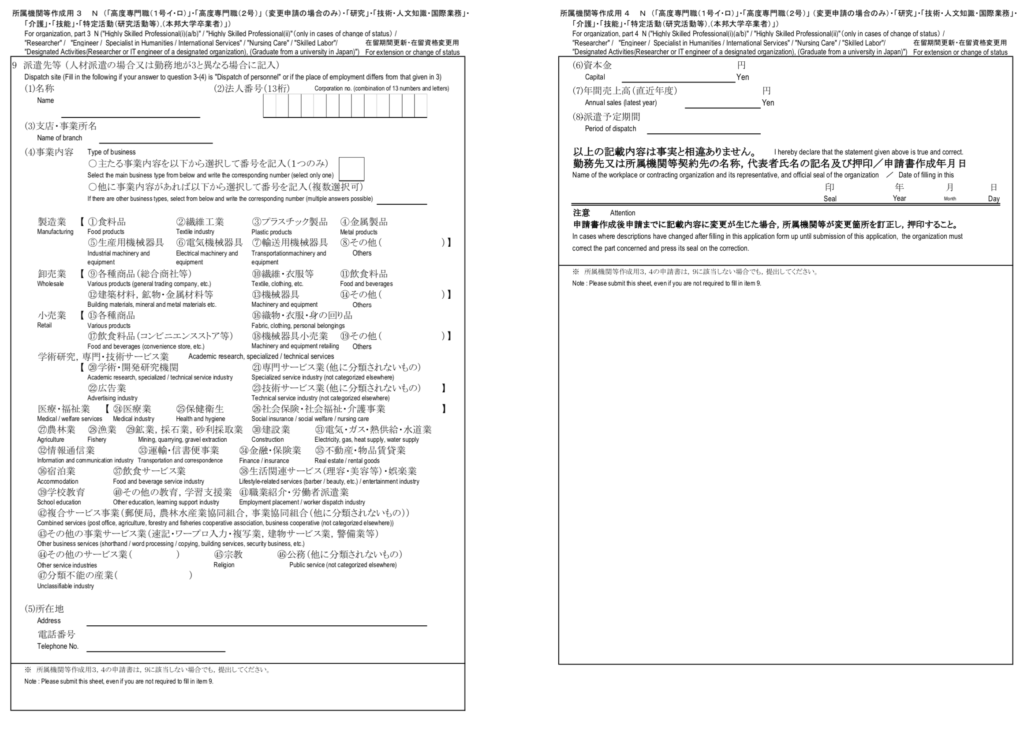
You can find and download the required documents for each type of visa here. We have provided an example of a work visa extension form which can be referenced when filling out other types of visa forms as well. Most importantly, remember to bring your zairyu card and passport!
1. Personal Information
Start off by filling out your personal information on the application, and then attach an ID photo that is 3×4 centimeters (details about identification photo).
2. Work/Employment Record
Fill out the required information about your current workplace and past employment.
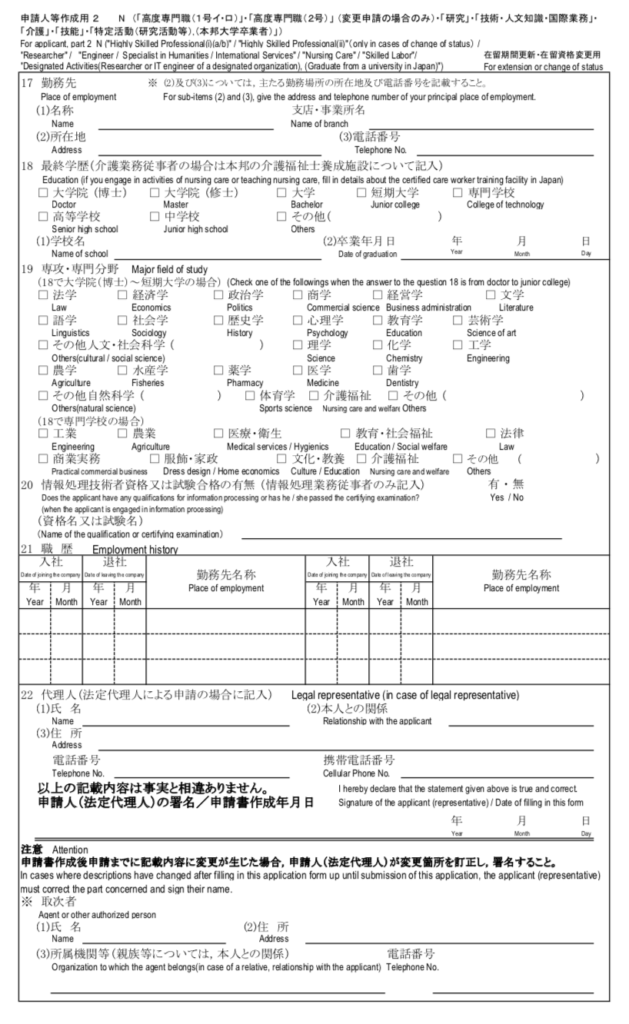
3. Documents That Must Be Filled Out by Your Employer
Visa extension applicants must request certain documents from their employers with the company’s official seal stamped on the last page. Most of the time, these documents should already be filled out by the employers (inform your employers of your intention to extend your visa in advance).
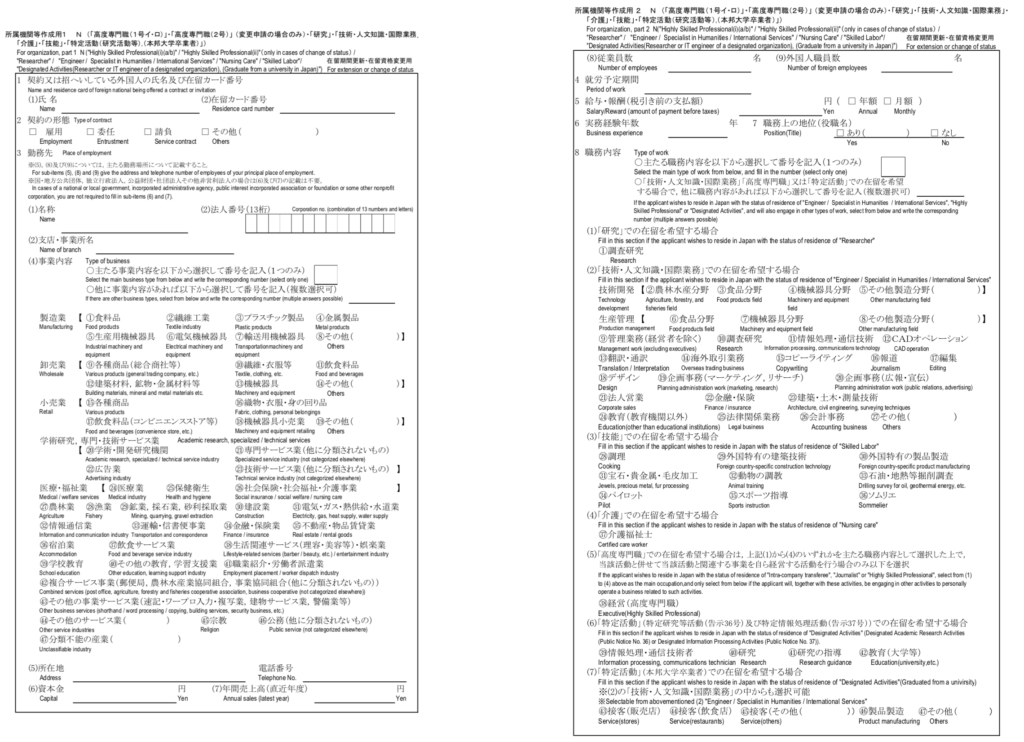
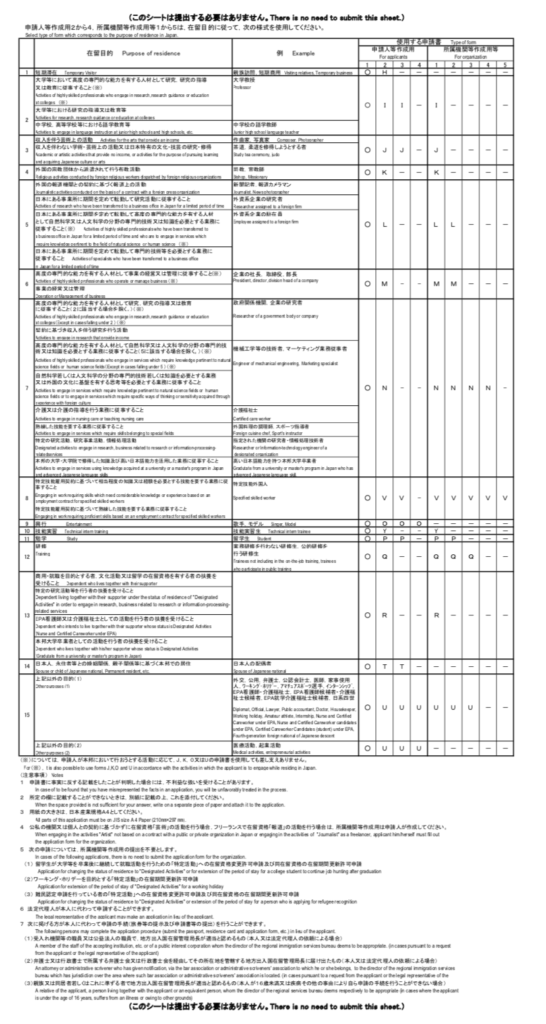
4. Information About Each Type of Visa (not for submission)
This part will provide information about the different types of visas and give examples of applicable occupations. You do not have to submit this document.
Going to the Tokyo Immigration Bureau (東京入国管理局)
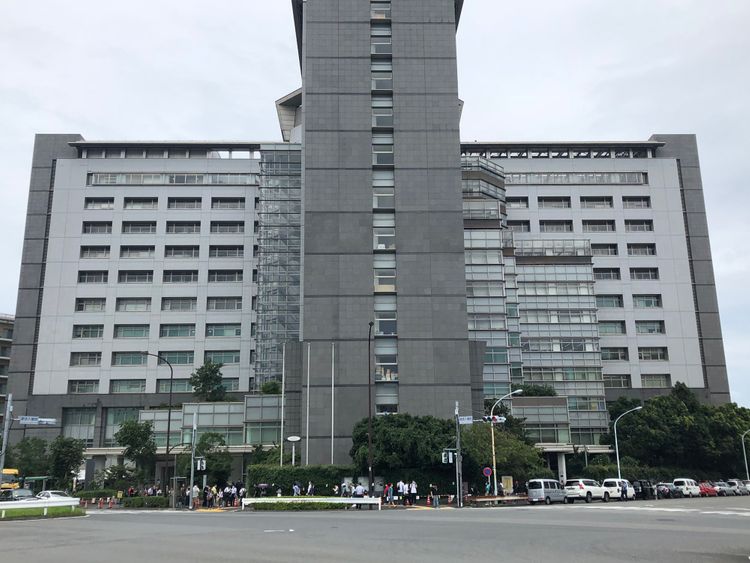
After preparing the documents, you will need to know how to get to the office where you can file. Here we will show you how to get to the Tokyo Immigration Bureau (東京入国管理局), the largest immigration office in Japan, which is located around Shinagawa Station. You can easily get there by following the steps below:

Shinagawa Station is a major station that can conveniently be accessed by a variety of train lines, including the Yamanote Line, Tokaido Line, Keihin-Tohoku Line, and Yokosuka Line.

After arriving at the station, head to the Central Gate. Since Shinagawa Station is always crowded, just follow the flow of people and you should be able to easily find the gate. There you will find the directional signpost showing you the way to the East Exit or the Konan Exit. Just follow the sign and head in that direction.

Another landmark of the Central Gate is the three-sided clock tower, which can be seen from any direction.

Once you get out of the ticket gates, turn right and head to the Konan Exit. You will immediately spot a gigantic tunnel; continue along that path.

After walking for a bit, you should be able to see an exit on the other side (but not the Konan Exit yet). Continue walking.

At the end of the tunnel, you will see the Atre Department Store (Shinagawa Branch). On your right will be the entrance to the shinkansen (bullet train) platforms.. You could go straight through the department store, or stop somewhere to grab some meals first if you have time.

When you see the Konan Exit sign, go ahead and head towards the exit. From this point you will have to get on a bus to get to the Tokyo Immigration Bureau, and there are MANY bus stops in this area, so be especially mindful of which bus you are boarding and where it’s heading. However, if you are looking to fit in some exercise, you can consider getting there with a 20-minute walk. We would advise against this during the summertime, with temperatures and humidity reaching potentially dangerous levels in Japan.

Once you exit, don’t go straight to the escalator. Use the skywalk on the left instead.

After turning left, you can just follow this long, curved skywalk. As the pathway is covered, you don’t need to worry about rain or bad weather.
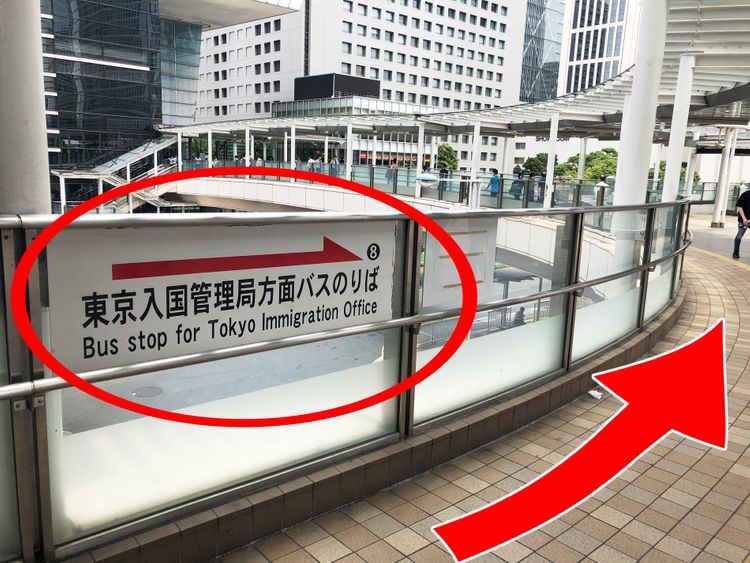
The Tokyo Immigration Bureau has many visitors daily, so there are signs that are obvious enough to tell us that we need to get to the No. 8 Bus Terminal and point us in the right direction. Just follow these signs until you find the correct bus stop.

Here is another sign that you should see. Go straight along the pathway and then go down the stairs.
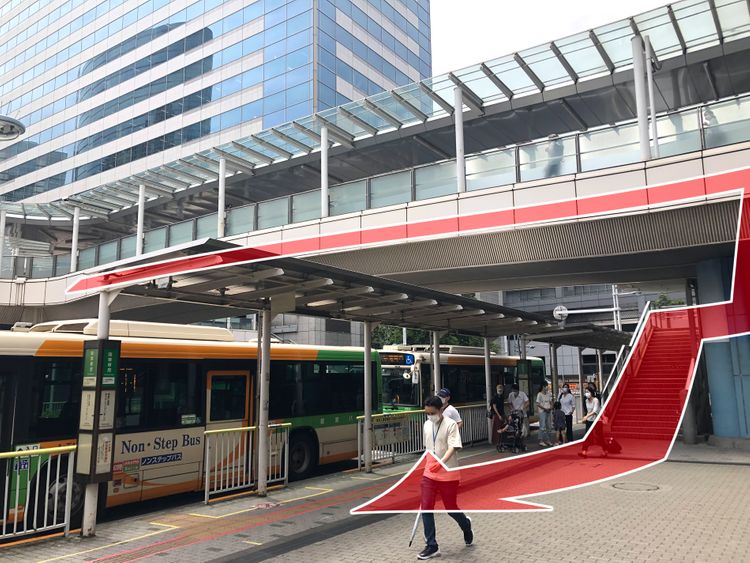
At the end of the skywalk, you will find the No. 8 bus terminal. There are usually buses waiting at this stop, as there are passengers boarding the buses all day long.

The bus you need to take is the No. 99 Bus. Jump right on if you are ready to head over to the Immigration Bureau! Do note that the queue can be quite long on crowded days.


For those who are still unsure where the correct bus stop is, try looking for a FamilyMart, as there is one directly opposite of the No.8 Bus Terminal. You can also grab some light meals there!

After about 10 minutes, you will find yourself at the Immigration Bureau. Get off the bus at the Tokyo Nyukoku-Kanrikyoku Mae (Tokyo Regional Immigration Bureau 東京入国管理局前) stop, or, perhaps more simply, where many foreigners disembark.
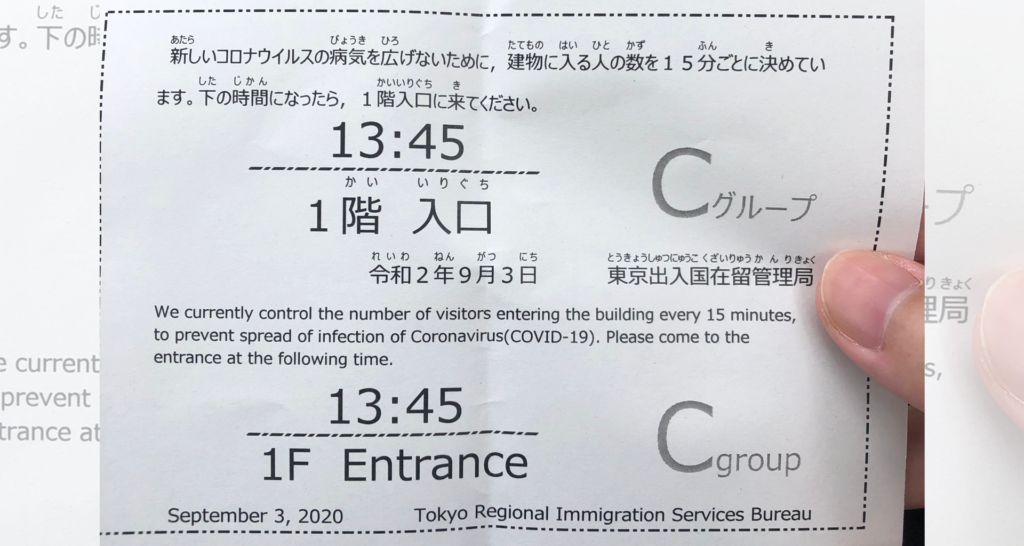
For social distancing purposes, the office is limiting the number of people in the building and will open the gate every fifteen minutes. Once you arrive, get in the queue at the spot pointed out in the above image.

If you don’t want to wait for too long, it is recommended to visit the office in the morning. Our editor stopped by at noon, and as that is when the office is usually crowded and it’s also the employees’ lunch break. He was queued with Group B, who were scheduled to be assisted at 3:00 pm, meaning he was going to have to endure a three-hour wait!
Most importantly: there is NOTHING to do around the Immigration Office. It is surrounded by exporters and ports. All there is is a convenience store that is next to the building, so if you are thinking about sitting and chilling at a cafe while you wait, you will need to go back to the station.
DO NOT lose your queue tickets! The immigration officer will ask for them several times, and you will need them when submitting documents.

When the time comes, line up according to the queue you have been assigned. There are boards displaying when and where each group needs to gather. Group A and Group B will line up in different spots. Make sure you are in the right place, or else you will be asked to get out of line.
Now you will finally be able to enter! Do note that taking photos is prohibited, so from here on we will continue without images.
Before entering the building, there will be a security check that is similar to those in airports and alcohol hand sanitizers that visitors can use to disinfect their hands before going inside. Once inside, you will also find an information counter in service. For those looking to apply for visa extension, your destination will be on the second floor.
Go to Counter B (which is yellow) which should be right in front of you after getting out of the escalator. There, immigration officers will check your documents to see if anything is missing. If you have everything that you need, you will be given a queue ticket for document submission and a postcard that you will receive when the result of your visa extension application is decided. Write your address on the postcard and wait at Counter B colored in orange Counter B colored in yellow nearby. There are seats available, and visitors are only allowed to sit with a distance of at least one seat apart from others, so you don’t have to worry about getting too close to anyone else.
When you are called, submit all the documents at the orange counter. After re-checking the documents, the officer will return your zairyu card and passport if there isn’t any problem, and then you are done!
It will take around two to four weeks before the notice postcard should be sent to your address. If your application is approved, you will need to go back to the Immigration Office again to receive the new zairyu card.


As an extra, here some photos of the nearby area, as our staff has some time to spare to explore a bit. There are lots of factories, an export-import harbor, trucks, and containers around the Immigration Office, showing another side of Japan that is unseen to many. You can go look around if you have time.
That’s it for today! We will follow-up this article after our staff gets the results of his visa application.
4 Weeks Later: The Result Is Here!
Our visa application approval postcard has finally arrived! Those who submitted all the necessary documents should be approved fairly painlessly. Let’s take a look at the postcard we received to see what it says.

The approval letter which was sent to our residential address has two sides. On the front side is our name, which we wrote on the postcard the day we submitted the application. The back side shows the result of your application, and if you passed the document screening, it will have the following information:
- The first section has the date that is the deadline for you to go get the visa (you should go within two weeks after receiving the postcard), as well as the timeframe during which you are able to pick it up. The second line details the counter you should go to and which floor it is on. On our postcard, we are told to go to counter A1 on the second floor between 9:00 am to 4:00 pm.
- The second section tells us what documents we have to bring the day we go to pick up our new residence card. Our staff had to bring his passport, residence card (zairyu card), enough revenue stamps (used as payment in lieu of cash or card; these can be purchased at the post office, convenience store, or Immigration Bureau day-of) to cover the fee, the queue ticket, and the visa approval postcard. The last one is any other documents aside from those mentioned above, and will be written in the parentheses in case you need to bring extra paperwork.
Prepare all the necessary documents and decide when you are available to go pick up your new zairyu card. When the day comes, it is time to go to the Immigration Bureau at Shinagawa Station one more time.
Once you arrive, get the queue ticket immediately. This time our staff stopped by at 12:30 pm and was scheduled to be assisted at 1:45 pm, which means he had to wait a little more than an hour. Comparatively, this is a considerably short amount of time. You can take this time to watch movies or listen to some nice songs while waiting.

Once you get inside the building, go straight to buy the revenue stamp if you have not already. You can purchase them at the FamilyMart located on the right-hand side of the entrance, and you need to get enough to match the price indicated on your postcard.
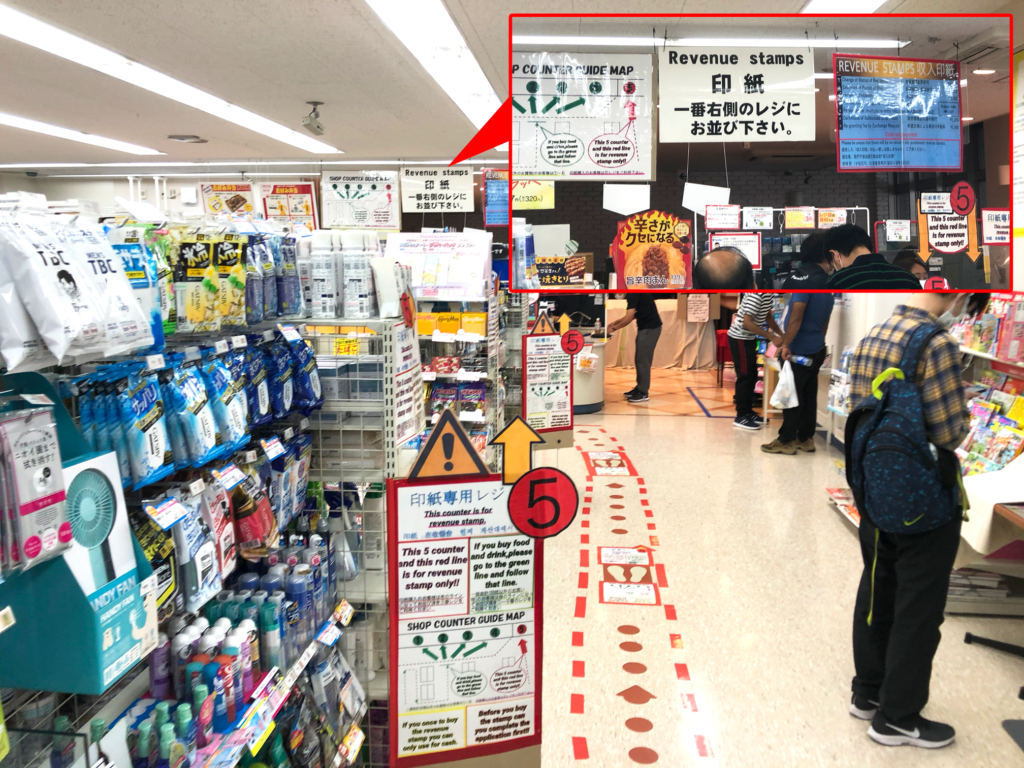
Once you step into Family Mart, turn right and follow the red dotted path. It will lead you to cash register no.5, which is the only place in the store where you can purchase the stamps. If you are not sure which stamp you should buy, show them the back side of your letter and the cashier will pick the right one(s) for you.

The stamp should look like the picture above. If you printed the payment form and brought it with you, adhere the stamp and sign to complete the form. It is perfectly alright if you did not print the payment form yet, as the officer will give you one when you hand in your documents, and you can attach the stamp right at the counter. Once you are done this, go straight to counter A1 where you will pick up your zairyu card.
Go up to the second floor and you should see a red line with “A1” embedded on the floor. Follow the path as it should lead you to the counter. Once you get there, get in the queue and wait to submit your documents.
Our staff told us that he had to wait inside for quite a long time in addition to the one hour wait before he even got in the building. It took him about two to three hours because it was very crowded on that day, and some people seem to take a while because they had to have a new visa issued (so many numbers were skipped). His suggestion was go grab some food from FamilyMart or try and find a place to sit.

But it was all worth it, as our staff got his new card! It’s nice and new and is valid for three years!
That’s all for today. See you again in the next article!
If you want to give feedback on any of our articles, you have an idea that you’d really like to see come to life, or you just have a question on Japan, hit us up on our Facebook!
The information in this article is accurate at the time of publication.